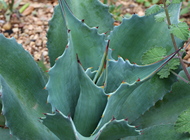
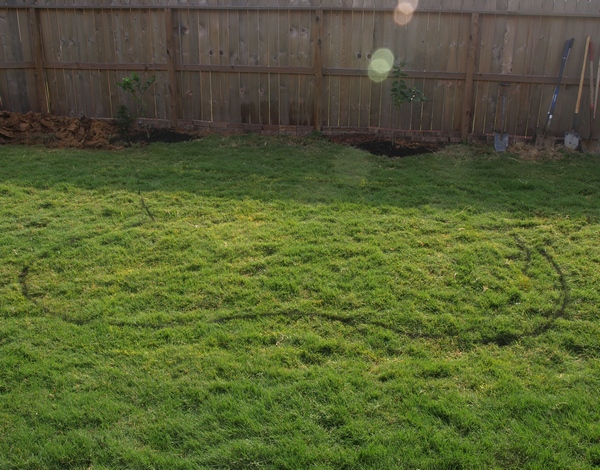
First, there was a Houston suburbs backyard. It had a fence around it. It had evil Bermuda grass from fence to fence to foundation. It wasn't very exciting to look at. Even after we dug a few little pocket borders along the back fence and planted a few tropicalish shrubs and perennials, the situation wasn't much improved. This garden was clearly missing something: moving water. Coming from our Pennsylvania garden, which featured two ponds (a little one that I built myself and a big one that we had professionally installed, the lack of water feature was an obvious deficit in our new environment. So we decided we'd get a pond. It would have to be professionally installed – I trust myself to create a rubber-lined hole in the ground (which was basically what our PA little pond was), but not to put together the more intricate features that make a pond really work: a bog filter, a waterfall, attractive rock placement, and all those other niceties. Problem was, building a pond isn't cheap, and we had just bought a house. So we hemmed and hawed for a while, leaving the garden in its uninspiring state, until finally, in spring of 2017 (9 months after moving in), we bit the bullet and commissioned the local experts to build us a pond. The local experts being Nelson Water Gardens, who seem to be the primary pond-building gig in town. The pond was to be nominally 6 × 10 ft in dimension, with some kind of waterfall crashing down from a bog filter. That's about as much definition as we agreed on – the rest of the plan would have to come together as the pond was being built. We secured a time slot in April for the project to kick off, and I secured a day off on the first day of the project, to see how things would come together. Early on the appointed Tuesday, the first job was to define the location of the pond. It had to stay 7 feet away from the fence, to clear the utility easement along the back of the yard, and ideally wouldn't cut into the swale that directs the rain from Houston's frequent torrential thunderstorms away from the house and yard, toward the street. The first impressions of the pond, rendered in spray paint, looked like this:
That meant the pond would be vaguely kidney-shaped, with the filtration bog and waterfall off the back, all placed in front of a couple of small satsuma orange trees we had planted earlier in the year. It was positioned such that it would be right in front of us as we opened the back door onto the patio. At this stage, we were under the impression that the bog filter would take up the entire area behind the pond, with waterfalls down into the main pond at a few thoughtfully defined locations.
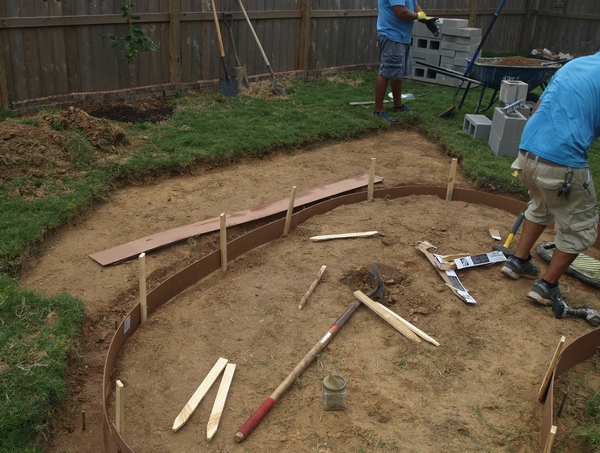
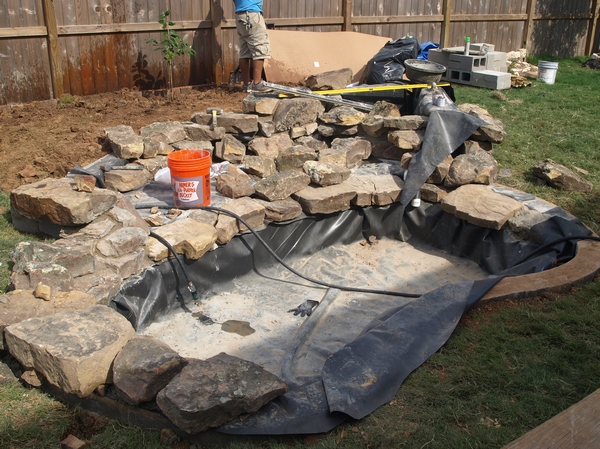
By early afternoon, the grass had been stripped from the projected pond area, and efforts were underway to build concrete forms that would define the perimeter of the main pond. All of the sod that was removed went into holes I was concurrently digging to create new garden borders along the back fence so that the new planting areas would be raised above the surrounding lawn – the projects complemented each other nicely. In the process of defining that shape, it looked like the front-to-back dimension wasn't going to be nearly 6 ft. I negotiated some extra width, but had to accept that the pond was then going to extend into the center of the swale. I decided that was more than worth it: I'd deal with drainage later, getting all the pond we were looking for was most important. Just after the concrete rim had been poured, a big thunderstorm rolled in, and chased the pond crew away. By the time I returned from work the next day, they had started up again, and made a good bit of progress:
The pond shape, in all its shapeliness, is now nicely defined in concrete (is it a kidney? is it a peanut? who knows?), and the main pond is being dug, with soil deposited behind the project to form a raised planting area. Behind the main pond, the area that was to be the bog was starting to take shape, constructed from cinderblocks filled in and cemented together with concrete mix. Two more days to go – would the project be finished on time? By the next afternoon, a lot more has come together:
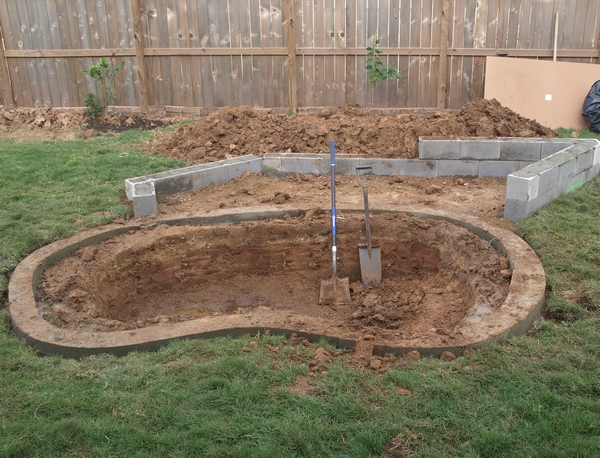
The digging is now all done, and the pond is lined in heavy black rubber. Some of the decorative rock is also being placed – an irregular brown rock known as "moss rock" around these parts, named for the patches of lichen that decorate its surfaces. It is now also evident that the pond crew's creative lead has decided to take a different approach to the bog from the one explained to us: the bog itself is a fairly small triangular feature at the back right, while the rest of the area behind the pond defines a stream that carries part of the water coming down from the fall leftways to enter the pond on the other end. While we weren't sure if the smaller bog would meet all of the pond's filtration needs, the stream certainly sounded enticing!
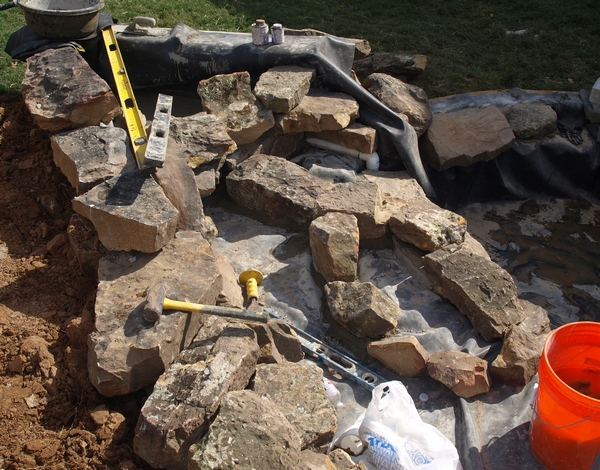
The picture above shows some more detail of the bog and stream area. The bog in the back is filled halfway up with concrete; the PVC pipe that will carry water up from the main pond into the bog extends to just above the concrete bottom. Across the front of the bog several rocks define where water will cascade down – half of it directly down into the right side of the pond, the other half to flow through a stream that has another small bog area (the oval ring of rocks) incorporated into it. Dirt is piled up behind this area to just about the height of the stream.
Along the side of the main pond, rocks are being cemented in place to hide and protect the liner. Compared to both of our previous ponds, the liner in this one will be much better hidden, besides the obvious areas in the bottom of the pond itelf: no ugly rubber in view above the water line.
The last day of the project has arrived. As the first order of business, the front edge of the pond is finished off with decorative rock, cemented in front of the liner along the water's edge to prevent a direct view to the rubber. Then flagstones are placed atop the entire edge assembly to finish it all off.
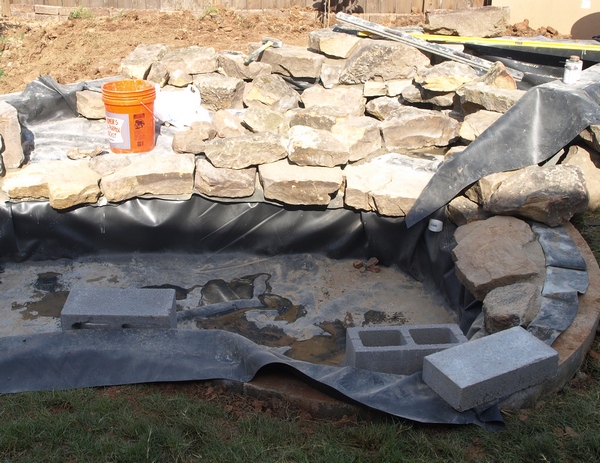
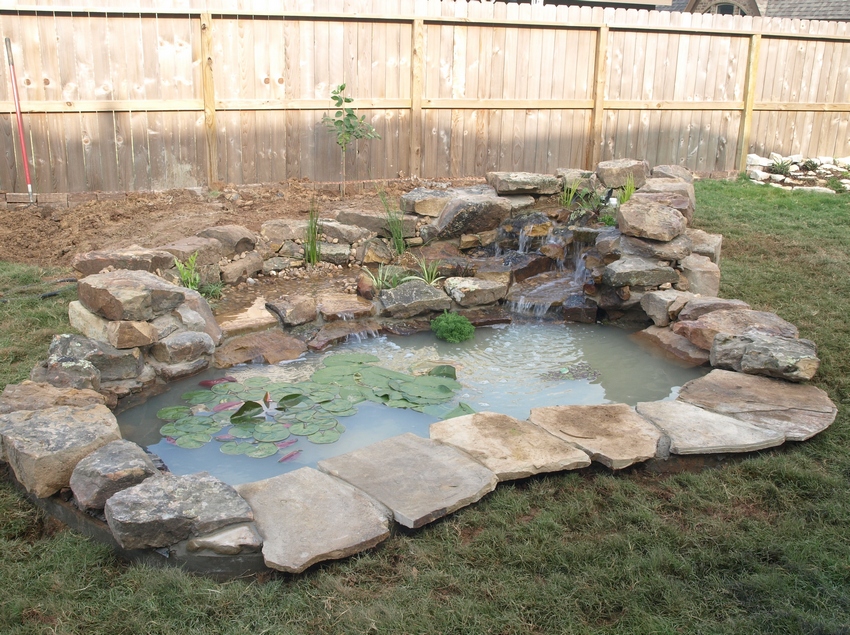
In another of the final touches, the distribution pipes for the bog filter are installed: the pump submerged in the main pond discharges water up a pipe to the concrete-bottomed bog area, where the flow splits into two PVC distributors. Both are cut crosswise at frequent intervals along their length to allow the water to emerge uniformly. This arrangement avoids high velocities in the quiescent bog zone so that biosolids can settle and be consumed by beneficial bacteria that establish themselves in the filtration media. The distributors terminate in threaded plugs, which provide access to the pipes for cleanout. In the next step, the triangular bog area is filled with pea gravel almost to the top, with the cleanout plugs sticking out just a little above. When the pump is operating, there's about an inch of water above the gravel, gently flowing toward the waterfall defined by the flat rocks at the left of the photo. The bog walls will be covered by flat rocks to hide the rubber lining. At this point, we leave the scene to go pick up some fish, waterlilies, and other plants at Nelson's retail center in Katy. By the time we return, the pond is operating, and almost full of water. After installing the plants, we take the first photo of our fully functional pond:
The water would stay cloudy for a few more days, as the fine dust on the rocks used in construction settled out. And we'd spend the next few weeks adding a few more plants, creating a little patio area in front of the pond, and crafting garden borders around the rest of the pond – we're not fond of the grass-bordering-pond look. The photo below shows the look six weeks later.
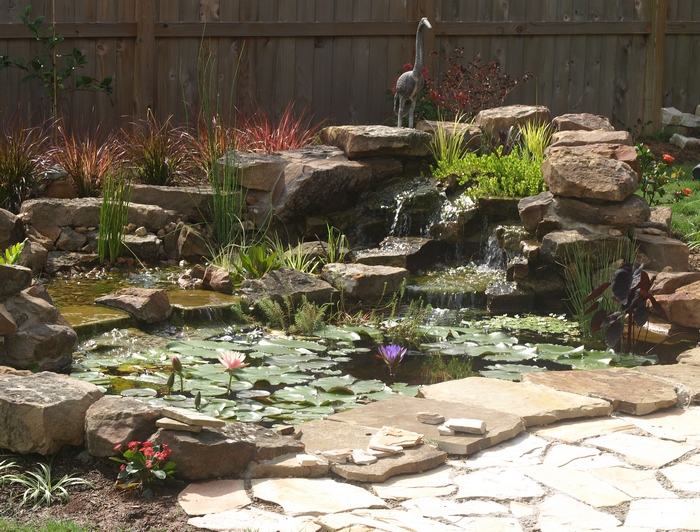
We're pleased with the way our pond is shaping up; it brings the garden alive, and entices us to spend more time in the backyard, to feed the fish, watch the dragonflies, toads, and water spiders, and listen to the rush of water across rocks as we tend to the rest of the garden. While this concludes the story of the building of the pond, I'll continue to update the page about the pond and its plantings as the waterfall pond continues to evolve.
I welcome comments about my web pages; feel free to use the form below to leave feedback about this particular page. For the benefit of other visitors to these pages, I will list any relevant comments you leave, and if appropriate, I will update my page to correct mis-information. Note that I discard any comments including html markups, so please submit your comment as plain text. If you have a comment about the website as a whole, please leave it in my guestbook. If you have a question that needs a personal response, please e-mail me.
Last modified:
November 04, 2017 |
|||||||||||||||||||||||||||||||||