First, we decided how big the trellis should be - in our case, about seven
foot tall (on the straight end), and about 18 inches square. Also, we decided
on a spoke-to-spoke spacing - about 14 inches. That determined the length of
copper pipe we needed:
The copper pipe comes in ten-foot lengths, in various diameters and wall thicknesses. For our structure, we chose half-inch pipe in the lightest gauge. Since we needed a total of 43 ft, we got five lengths, to have some room for errors and waste. We also needed twenty (five times four) copper tees, and four copper unions and some copper tubing for the rounded bits up top. The bendable tubing comes on a roll - one roll should easily suffice for this job. Some other things you'll need to put the structure together:
Use the piping cutter (a hacksaw will do if you don't have one) to cut the
lengths of copper pipe. For our example, we need twentyfour (four times six)
14" pieces for the uprights, and ten (five times two) 18" crosspieces.
Now comes the interesting part - putting it all together. When I first made this, I had never done any silver soldering before, and my handywork left much to be desired, but it can be a little sloppy since the structure doesn't have to withstand any pressure from within. There are better references on silver soldering than I can provide, but the basics are: clean both parts of each union with wire brushes, apply a little flux, and put the parts together. Use the torch to get all parts of the union nice and hot, to the point where just touching the line of soldering tin to the hot metal immediately melts it. If you've done everything right, the molten tin will wick right in between the two pieces of copper and you're done in a second - now be careful not to touch that part of the structure for a few minutes! I built the structure from the bottom up. First I put together the two H-pieces at the bottom, using four uprights, one cross-piece, and two tees for each one. It helps to have a vice or something similar to hold the pipe while you're putting together the loose pieces that can't stand up on their own yet. Make sure that the two uprights of each H are exactly parallel, or leave one cross-union unsoldered until you've completed the next step. Next, connect the two H-pieces using four tees and two more cross-pieces. Make
sure the structure is pretty well squared before soldering these connections.
From this point on, the structure can stand up by itself, and the process becomes
easier, just building upwards piece by piece. We chose to alternate the cross-pieces,
going left-to-right and back-to-back at even vertical intervals, but you can
get creative with the design, even concocting spiraling or asymmetic structures.
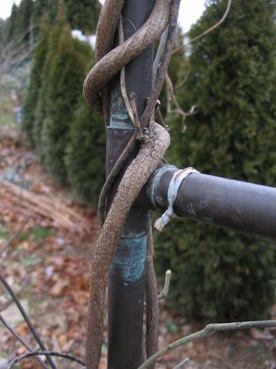
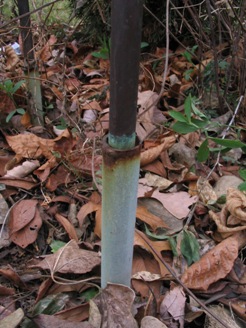
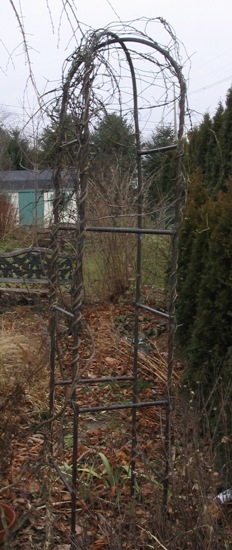
The last part is using the four unions to connect the arches to the top of the structure. To bend the tubing to just the right curvature, it helps to have a cylindrical structure (say, a round garbage can, or a gas grill propane cylinder) the guide the tubing - the flexible copper kinks easily otherwise. Solder these last bits together, and the structure is complete! When we first installed the trellis in our side garden, we just forced some length of the bottom tube ends into the soil for support. Not so easy, because there is no good way to apply downward pressure on all four legs at once, and the structure is somewhat bendy. As a result, we never got the legs in quite deep enough, and the trellis kept toppling in high winds. After about a year, I got smarter, and got my hands on a piece of metal pipe
that was just big enough that the copper tube could slip in. I cut the pipe into
four pieces, probably about 16" each, drove each piece into the soil where the
legs had gone in before, to where they emerged for only about 4", and just lowered
the trellis into its new foundation. It has remained steady ever since.
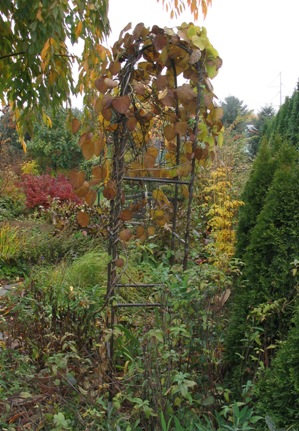
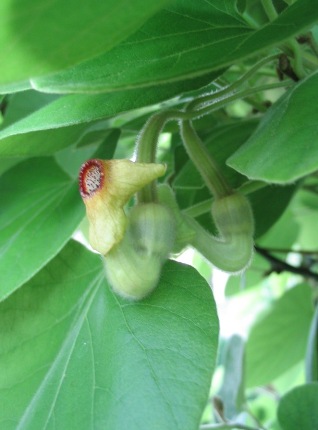
That's at least five years ago. The trellis still hasn't attained that green patina (except at the heat-affected unions), but it lost its shiny new look pretty quickly. It now supports our Dutchman's pipe vine, as well as a few annual vines that change from year to year. We quite like our home-built creation, and have talked about coming up with another design for years. Maybe one day we will - if so, you'll be the first to read about it!
Visitors to this page have left the following comments
I welcome comments about my web pages; feel free to use the form below to leave feedback about this particular page. For the benefit of other visitors to these pages, I will list any relevant comments you leave, and if appropriate, I will update my page to correct mis-information. Note that I discard any comments including html markups, so please submit your comment as plain text. If you have a comment about the website as a whole, please leave it in my guestbook. If you have a question that needs a personal response, please e-mail me.
Last modified:
January 08, 2011 |
|||||||||||||||||||||||||||||||||||||||||||||

 One day a good number of years ago, while visiting a local herb nursery, we
came upon a free-standing copper trellis structure in their display garden.
Impressed, we decided to try our own hand at creating one. Since we hadn't
carefully studied the construction of the original, the recreation process was
rather improvisational. It's been a while, but I'll try to recollect for you
how we put it together.
One day a good number of years ago, while visiting a local herb nursery, we
came upon a free-standing copper trellis structure in their display garden.
Impressed, we decided to try our own hand at creating one. Since we hadn't
carefully studied the construction of the original, the recreation process was
rather improvisational. It's been a while, but I'll try to recollect for you
how we put it together.